


Banjo Tuning Notes
It’s time to get into the nuts and bolts of banjo tuning! Whether you’re an absolute beginner or a current player looking to refresh yourself on the best tuning methods, this is a great place to start.
Before You Begin
Before we jump into the details of banjo tuning, let’s gather the necessary materials. You will need a clean workspace, a pair of pliers or wire cutters and an electronic tuner. There are ways to figure out 4 string banjo tuning and 5 string banjo tuning by ear, but we’ll discuss those later.
Tuning Notes
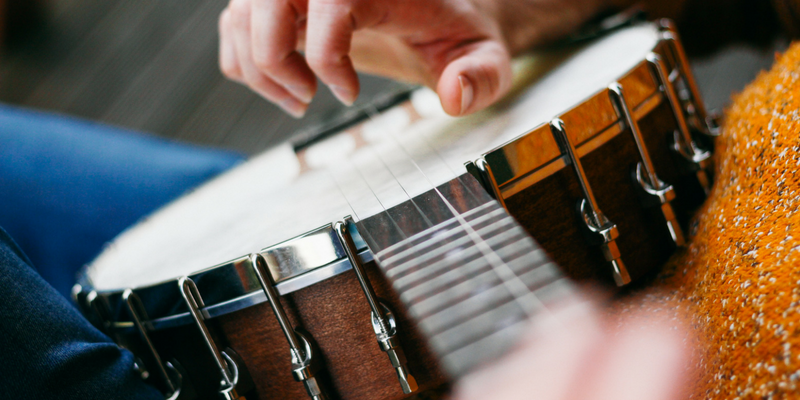
The 5 string banjo uses “re-entrant” tuning, meaning that the 5th string is actually higher in pitch than the other four strings below. The tuning of each of the strings is as follows, beginning with the 5th string (the one that is tuned by the peg at the 5th fret): G, D, G, B, D.
This tuning is also called “open G” tuning because when you strum the open strings, you get a G major chord.
Please note that the 5th string note G is an octave higher than the 3rd string G. Similarly, for strings 4 and 1, both are tuned to D, except the 1st string is one octave higher. You can use your electronic tuner to produce the standard 5 string banjo tuning shown above.
Tuning By Ear
Here are a few little tricks you can use as reference pitches if you don’t have a tuner handy:
Strings 1 and 4 are both tuned to D, one octave apart. Choose what sounds like D to you and tune these two strings to an octave, which should be easy to hear (1st string is an octave higher).
The open 5th string should match the 1st string, 5th fret. Open 1st string matches 2nd string, 3rd fret. Open 2nd string matches 3rd string, 4th fret. Open 3rd string matches 4th string, 5th fret.
Make Your Marks
This one is important, so take note. Before you start changing your strings, you’ll need to use a pencil to lightly mark the position of your bridge on the face of the banjo.
Start on the outer edge of the bridge and trace a right angle toward the center so you can replace the bridge in the correct position when it’s time to tighten your new strings. The bridge naturally moves as the tightening and loosening of strings changes the tension on the bridge and neck.
Establish a Pattern
When you’re ready to change your strings, it’s a good idea to do so in a particular pattern to eliminate bridge slippage as discussed above. Here’s how it works:
When removing old strings, only remove one at a time. Begin with the 1st string, then replace it and tune the string up to the approximate pitch. Next, skip the 2nd string and repeat the same process with the 3rd string. Follow by changing and tuning the 2nd, 4th and 5th strings, respectively.
You could also reverse this pattern, working your way from the 5th string down to the 1st. The important thing is to always skip a string when changing strings and tuning new ones, which ensures the tension is dispersed evenly across the neck of the banjo.
On the other hand, if you’re simply tuning a banjo that has been sitting unplayed for a day or two, it’s not nearly as important to use the skipping pattern because the strings will hold their pitch quite well if they’ve been secured properly.
We’ll now discuss exactly how to do that.
Loop, Turn and Cut
To remove your 1st or 2nd string, turn the tuning peg counterclockwise to loosen it. To loosen strings 5 to 3, turn clockwise.
Once the string is loose, remove the loop from the hook at the tailpiece of the banjo. Then remove the crimped portion of string from the tuning peg.
Carefully uncoil the new string and attach it to the hook at the tailpiece and guide it through the saddle in the bridge all the way up through the hole in the tuning peg. Tighten the string a few turns and guide the string into the corresponding saddle at the nut.
As you tighten the string, gently pass it over the top of the tuning peg in the opposite direction of the turn, ensuring a more secure grip on the peg.
Stretch, Tune and Repeat
Stretching your new strings is important to ensure that they hold their tuning. This is especially important if you often play in groups or in a live setting, because the last thing you want is for your strings to slip in the middle of a tune.
Stretch your strings by gently pulling them away from the fretboard with your index finger, and then bring them back up to pitch using the electronic tuner. After you’ve done this a few times, play a few scales or short songs. A new set of strings will typically settle after just one to two short practice sessions.
Now that you know the ins and outs, you should feel ready to tackle banjo tuning with ease.
Interested in taking your Banjo playing to the next level? Sign up for lessons directly from the legendary Tony Trischka. You'll get access to hundreds of lessons, and personal video feedback from Tony himself.

Comments