


Online Guitar Lessons
14 GREAT guitar teachers help you play like you dreamed you would.
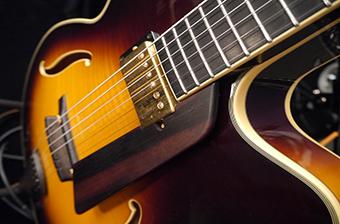
About Our Guitar Lessons
14 master guitarists deliver the best music courses on the Internet. Choose from rock, jazz, blues, country, bluegrass, classical and beginner acoustic.
Guitar Courses
-

Dave Isaacs
Session Player ToolkitPartner with the premier Nashville educator to master the skills you need to become a well-rounded guitarist.
-

Bryan Sutton
Bluegrass GuitarGrammy® and multi-IBMA Guitar Player of the Year teaches bluegrass guitar lessons for everyone.
-

Noa Drezner
Flamenco GuitarThe flamenco master teaches her unique techniques in this comprehensive guitar course for all levels.
-

Seth Rosenbloom
Blues GuitarThe guitar master teaches his unique style and approach to aspiring blues players of every level.
-

Andy McKee
Acoustic Fingerstyle GuitarThe acoustic guitar virtuoso teaches his innovative fingerstyle methods in a course designed for all levels.
-

Keb' Mo'
Americana RootsSecure lifetime access to the entire three-volume guitar course taught by legendary blues master, Keb’ Mo’!
-

Tyler Grant
GuitarThe National Flatpicking Champion teaches his guitar methods in this comprehensive course for all levels.
-

Paul Gilbert
Rock GuitarThe Grammy®-nominated rock guitarist breaks down his indestructible playing techniques in an approachable way.
-

Sean McGowan
Fingerstyle Jazz GuitarJoin the jazz guitar master as he teaches his critically acclaimed sound & style to players of all levels.
-

Guthrie Trapp
Electric Country GuitarThe Nashville guitar icon teaches his signature Telecaster techniques, from beginner riffs to advanced solos.
-

Jared James Nichols
Blues Rock GuitarWorld-renowned riff master teaches blues and hard rock guitar lessons for players of all levels.
-

Beginner's Guide
Rock GuitarDesigned for first-time players, learn rock guitar basics and classic rock songs from a Berklee professor.
-

Chris Eldridge
Bluegrass Guitar“Punch Brothers” co-founder and acoustic guitar virtuoso teaches bluegrass guitar for players of all levels.
-

Beginner's Guide
Acoustic GuitarPerfect for new or first time players, especially designed for adults. Learn acoustic guitar basics and easy guitar songs.
-

Keith Wyatt
Blues Guitar"The Blasters" lead guitarist teaches classic and modern blues to Texas roadhouse.
-

Martin Taylor
Fingerstyle Jazz GuitarThe 14-time British Jazz Award recipient teaches his signature fingerstyle guitar playing for all skill levels.
-

Jason Vieaux
Classical GuitarThe Grammy® award winner, performer & noted professor teaches classical guitar lessons for all players.
-

Dave Stryker
Jazz GuitarThe chart-topping guitar veteran shares essential warm-up exercises, improvisational jazz secrets, and more.
-

Andy Hall
Dobro & Lap SteelThe Infamous Stringduster’s and multi-IBMA award winner teaches Dobro & lap steel for players of all levels.
-

Chuck Loeb
Jazz Improv GuitarThe late guitar mastermind lives on in hundreds of video lessons, spanning basic to signature jazz guitar skills.


Why Learn Guitar From ArtistWorks?
Start by learning about our unique Video Exchange Learning for Guitar

Learn guitar at your own pace, on your own schedule

Hundreds of Guitar Lessons, for all levels, from beginner to advanced.

Multiple popular genres to choose from. Acoustic and electric.
Play the video in slow motion and utilize video looping

Sign Up for a Free Lesson
Choose an instrument and style, and we’ll send you free lessons that are tailored to your musical goals. You’ll also receive exclusive discounts, news about our latest courses, and much more.